Real-time Application Performance Monitoring with Laravel Pulse
After a lot of hype in Laravel AU 2023 about this secret project, Laravel Pulse is finally out in the wild. It’s a real-time application performance monitoring tool for Laravel applications.
Laravel Pulse
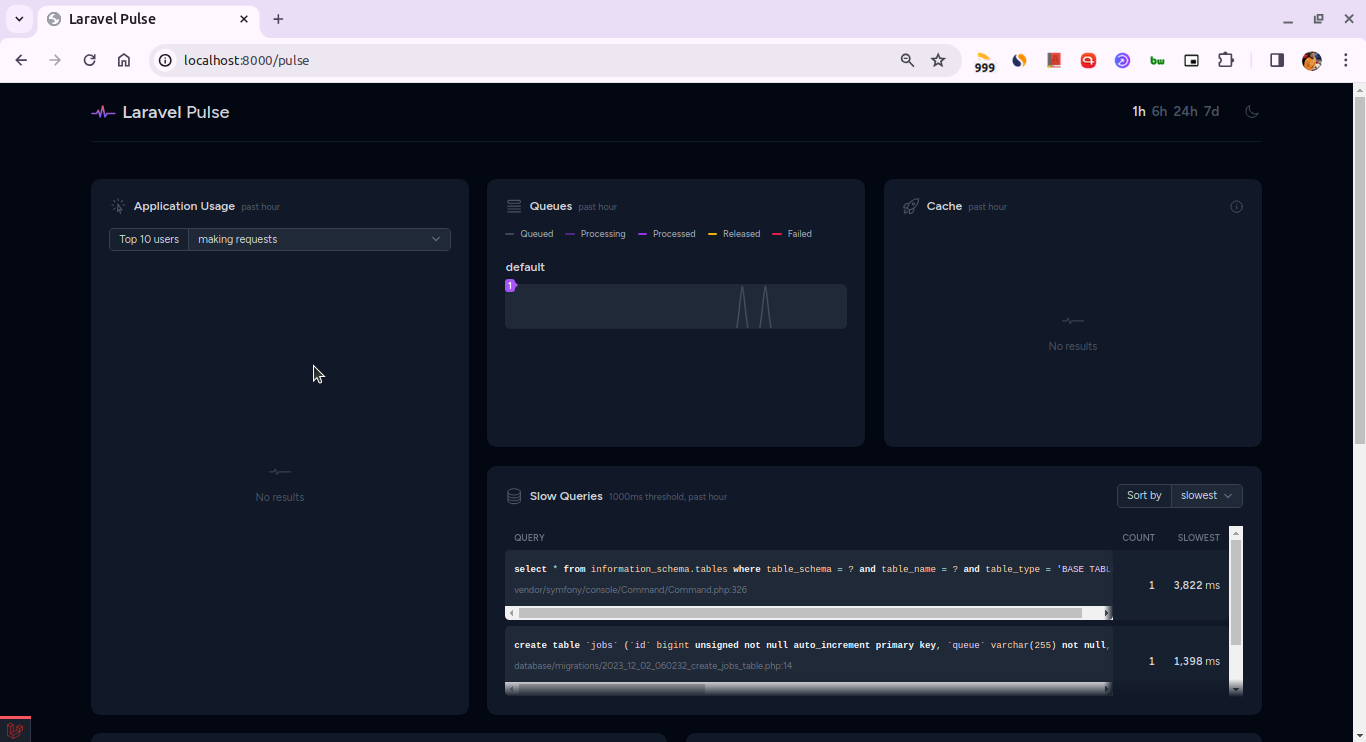
It’s a first-party package by Laravel. Although still in beta, it’s already looking very promising. It monitors and shows a host of metrics about your Laravel application in real time. These metrics can help you identify performance bottlenecks in your application.
It shows all these on the dashboard built using a nice card-based UI. It also has a dark mode which is a nice touch.
Here’s what it can show at the moment.
- Top users based on a number of requests, slow endpoints, and dispatching jobs.
- Status of queues.
- Status of the cache in your application.
- Slow queries.
- Exceptions and errors and where they occurred.
- Slow requests and how much time they took to complete.
- Slow jobs.
- Slow outgoing requests.
Installation
To install Laravel Pulse, you can use the following command.
composer require laravel/pulse
Once installed, you need to run the migrations to create the required tables to run Pulse correctly.
php artisan migrate
Dashboard
To access the dashboard, you can visit the /pulse route in your application. For instance, if you’re running your application on http://localhost:8000, you can visit http://localhost:8000/pulse to access the dashboard.
Server metrics
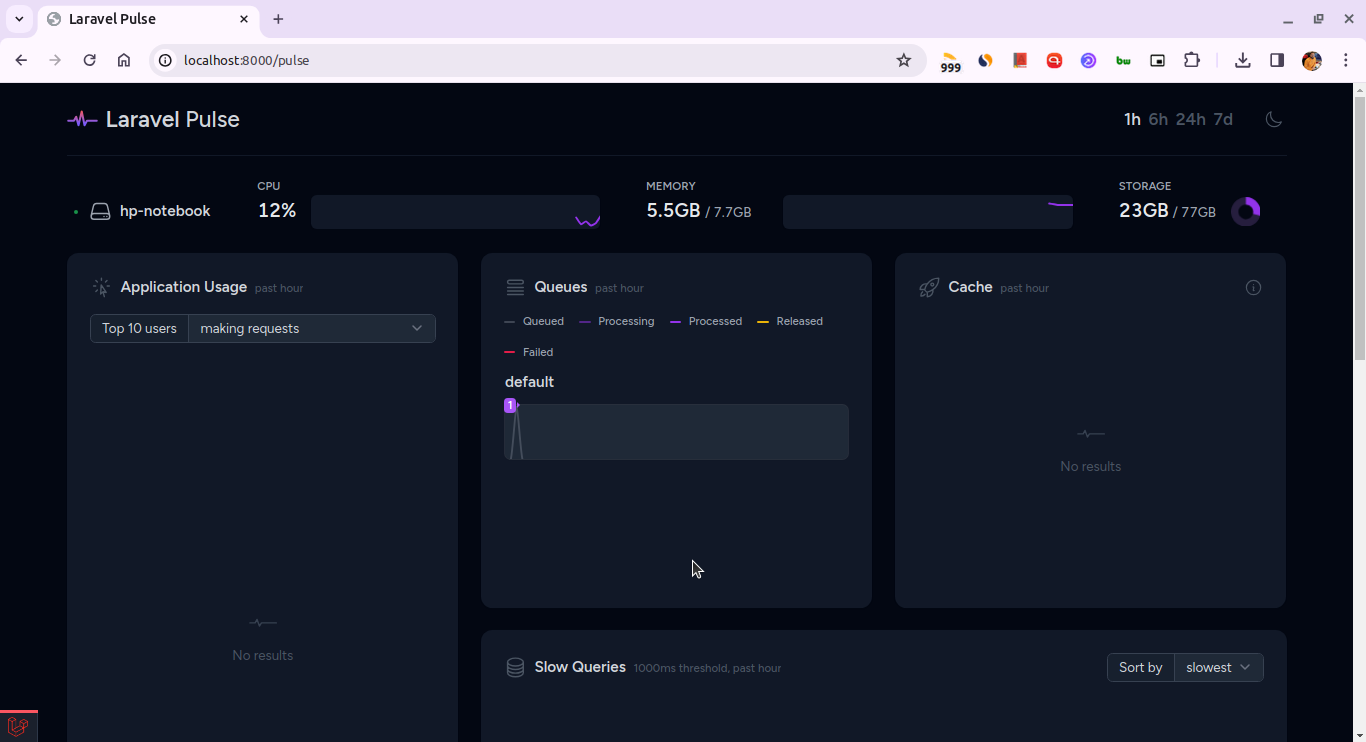
Laravel Pulse can also show information about the server your application is running on. Information such as CPU usage, memory usage, disk usage, and so on.
To enable these metrics, you need to run the following command. Ot better yet, run it in the background as a daemon using Supervisor.
php artisan pulse:check
This daemon will keep poling the server for the metrics on a regular interval to keep the dashboard updated.
Here’s how the updated dashboard looks like.
Using on production environments
By default, Laravel Pulse would only work in the local environment. But if you want to use it on production, you will need to configure authorization for your production environments by customizing the viewPulse authorization gate.
You can accomplish this within your application’s app/Providers/AuthServiceProvider.php file like so.
use App\Models\User;
use Illuminate\Support\Facades\Gate;

/**
 * Register any authentication / authorization services.
 */
public function boot(): void
{
    Gate::define('viewPulse', function (User $user) {
        return $user->isAdmin();
    });
}
So, now only the users who are admin will be able to access the dashboard.
In closing
And that’s about it. That’s all we know about Laravel Pulse at the moment. I’m sure there will be more features added to it in the future. But for now, it’s a great tool to get started with monitoring your Laravel application if you haven’t already.
Like this article? Consider leaving a
Tip👋 Hi there! I'm Amit. I write articles about all things web development. You can become a sponsor on my blog to help me continue my writing journey and get your brand in front of thousands of eyes.


