The many ways to take screenshots on Ubuntu
I take a lot of screenshots and they are part of my daily workflow. As I mentioned at my uses page, I use Ubuntu 18.04 LTS as my primary OS and there are native shortcuts to take screen shot in this particular OS.
- PrtSc - The classic way to print the entire screen is by hitting PrtSc which ultimately saves the screenshot in the
Picturesdirectory. - Alt + PrtSc - The combination of these two keys takes the screenshot of the active window and saves it in the
Picturesdirectory. - Shift + PrtSc - This will allow you to take part of the screen by giving you a selection tool and saves it to the
Picturesdirectory. - Ctrl + Shift + PrtSc - It will do same as Shift + PrtSc but instead of saving the screenshot into the
Picturesdirectory, it will copy the selection into the system clipboard. - Ctrl + PrtSc - This will save the entire screenshot of the entire screen into the system clipboard.
These all are native way to take screenshots on Ubuntu but these methods are not intuitive. So, if you want more adavanced usage, you’ll need to install third-party tools.
Flameshot
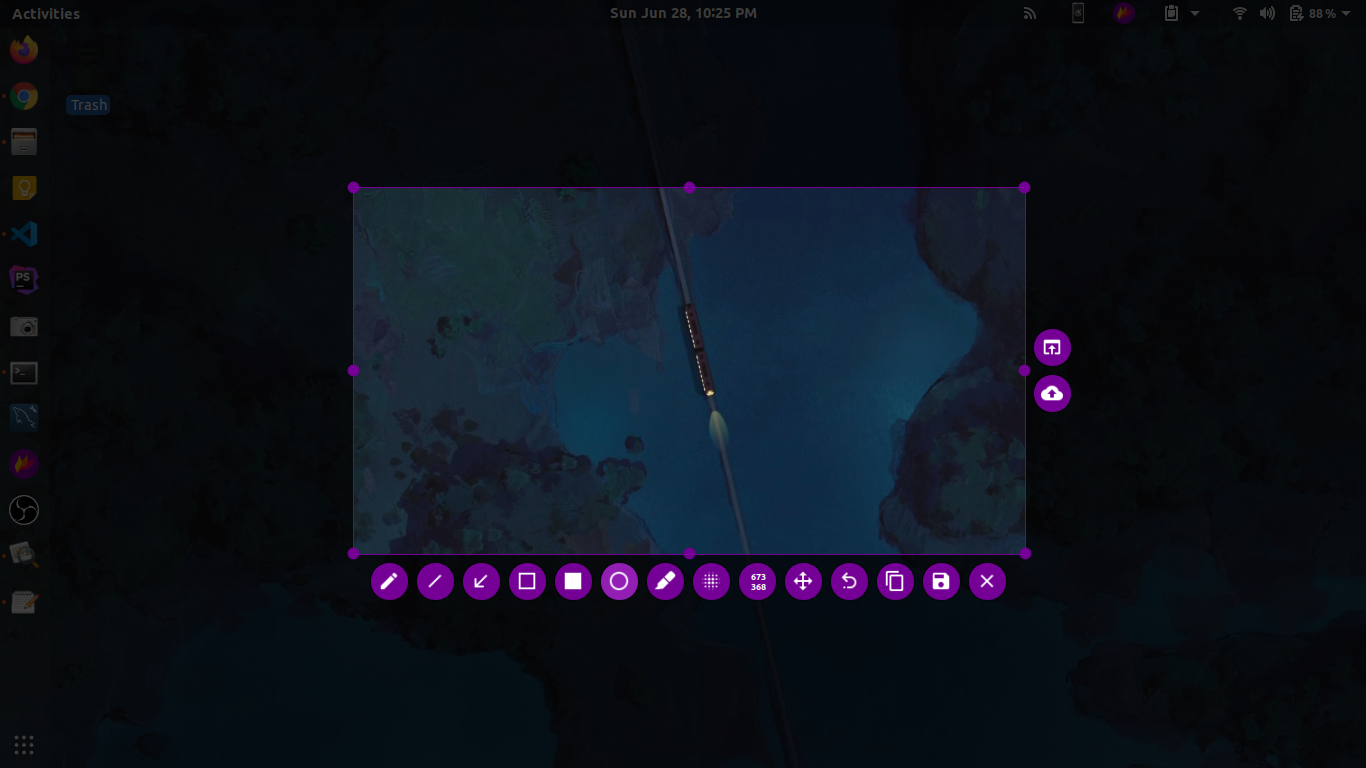
The one that I’m currently using is called Flameshot. This is a pretty great tool of taking screenshots. It has got loads of features into it. But the feature that get me using this tool is the resizable selection area that it gives while taking screenshot.
So, whenever you invoke Flameshot, it will allow you to select part of the screen. But after selection it won’t just go away. The selection would stay there and allow you to resize the selection with options to draw, annotate, blur things on the image and host of other features like so.

You can install Flameshot in Ubuntu using following command:
$ apt install flameshot
You can learn more about Flameshot such as keyboard shortcuts and installation in other Linux environments at its GitHub repository over here.
Zoho’s Annotator Tool
This is not really specific to Ubuntu (Or Linux) but Zoho’s Annotator is the chrome extension if I want to take screenshots in the Chrome browser. For instance, the tool allows you to take full page screenshots, which wouldn’t be possible to do with previously mentioned tools.
Apart from this, it allows you take regular screenshots and has a really nice support for image annotations.
What’s more? It even lets you take screenshots of the application windows using “Desktop Screen” option.
You can learn about how to install it and entire list of features on its official website.
👋 Hi there! This is Amit, again. I write articles about all things web development. If you enjoy my work (the articles, the open-source projects, my general demeanour... anything really), consider leaving a tip & supporting the site. Your support is incredibly appreciated!


